Flash For Indoor Photography” refers to the use of artificial light, typically from a flash unit, to illuminate subjects in indoor settings. This technique is commonly used in low-light conditions to provide adequate lighting for capturing photos indoors. It can help to reduce the harshness of shadows and improve the overall quality of the images by providing the necessary light for proper exposure.
In indoor photography, the decision to use flash depends on various factors such as the available natural light, the desired effect, and the specific shooting conditions. Understanding when to use flash in indoor photography is crucial for achieving well-exposed and visually appealing images.
The importance of light in indoor photography cannot be overstated. Whether using natural or artificial light, the right lighting is essential for capturing compelling indoor photographs. In indoor settings, photographers often need to balance available light with the use of flash to achieve the desired results.
What is flash photography?
Flash photography refers to using a flash unit or speedlight to supplement the existing ambient light in a scene. The flash provides a short, intense burst of light to help properly expose dark areas that would otherwise be underexposed.
Using flash opens up more possibilities for indoor photography by allowing you to achieve proper exposure, freeze motion, and create more flattering light. There are many types of flash units available, from basic pop-up flashes built into DSLR cameras to more advanced speedlights and studio strobes. Learning how to effectively use flash enables indoor photographers to take their work to the next level.
While indoor flash photography can seem intimidating at first, it simply involves balancing the intensity of the flash with the ambient light. Key settings like flash power, shutter speed, aperture, and ISO all play a role in blending the existing light with the added light from your flash.
How does flash affect indoor photos?
Using flash for indoor photography impacts images in several ways. Most notably, adding flash brightens up dark, underexposed areas of a scene to bring out details that would otherwise be lost. The quick burst of light from a flash unit also allows photographers to freeze motion, capturing sharp images of moving subjects indoors.
Flash can improve image quality in low indoor light, resulting in less noise and cleaner photos compared to high ISO images without flash. Flash does require some finesse, as it can also introduce some unwanted effects like harsh shadows, overexposed hot spots, and red eyes in portraits.
Photographers need to learn flash techniques like bouncing and diffusing to create more flattering light. Used effectively, adding flash for indoor shots brings out details, colors, textures, and dimensions that often get lost in dim natural light. It takes some practice, but balancing flash with ambient light gives photographers much more control over exposure for indoor images.
When should I use flash indoors
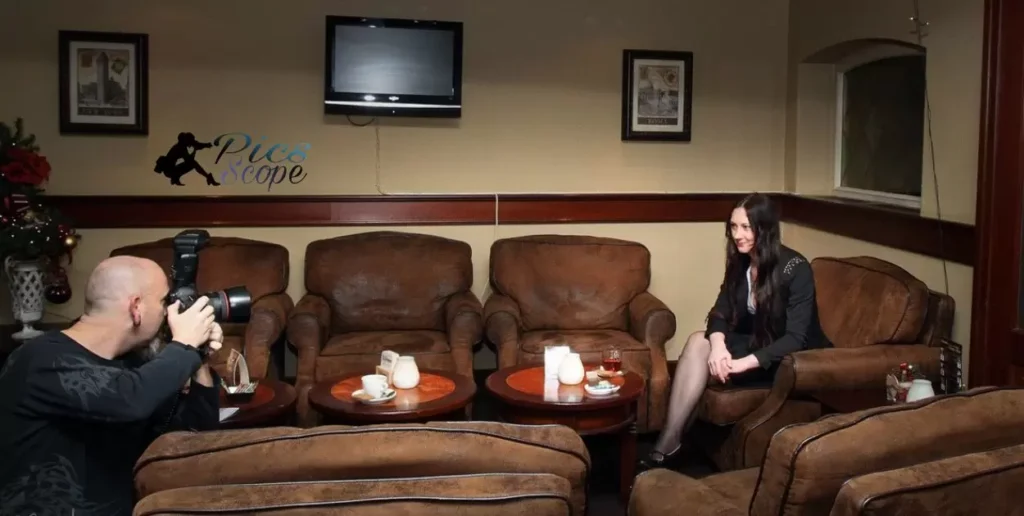
There are several scenarios that call for using flash for your indoor photography. Flash is extremely useful any time you need to supplement dark, low ambient light levels indoors. For example, if you want to photograph an event or reception inside a dimly lit venue, adding flash is likely necessary to properly expose people’s faces and bring out important details.
Flash also helps capture sharp, clearly exposed product shots, food photos, or still life images indoors when you don’t have ideal natural light. Mixing in flash when shooting indoor portraits can help create more flattering light on your subjects, especially if the only available light casts unappealing shadows on their face.
Freezing motion with flash also allows you to photograph active indoor scenes like dancing at events or kids playing inside, resulting in sharp, clear shots rather than blurry photos. Anytime the existing indoor light leaves you struggling to get clean, bright, detailed images, bringing in extra flash can take your photography to the next level.
What Camera Settings Work Best for Indoor Flash Photography?
When shooting indoor flash photography, there are a few key camera settings to keep in mind. First, it is generally recommended to use a mid-range aperture around f/8. This allows enough light from the flash to enter the lens while also providing adequate depth of field.
Using a very wide aperture can result in uneven lighting, while stopping down too far may require higher ISO settings leading to noise. Shutter speed is another important consideration. Most cameras have a “flash sync speed” ranging from 1/125 to 1/250 second. Setting your shutter speed to sync speed allows the full flash burst to expose the entire frame.
What aperture is best for indoor flash photography?
As mentioned above, a mid-range aperture around f/8 is generally recommended as the best starting point. At f/8, you’ll be able to capture enough light while maintaining reasonably sharp focus from front to back.
Very wide apertures can sometimes cause uneven lighting from the flash, while stopping down too far may force you to use higher ISOs and introduce noise into your images. f/8 strikes a good balance between flash exposure, depth of field, and image noise when shooting indoors with flash.
What shutter speed works with flash photography?
The optimal shutter speed for flash photography is your camera’s flash sync speed, usually around 1/200 or 1/250 second. This allows the full flash pulse to expose the entire frame. You can sometimes get away with using slower shutter speeds, allowing you to balance flash exposure with ambient light. But this takes some finesse and testing to get right.
How does ISO impact flash photography
In flash photography, ISO settings impact two things: the ambient light exposure and image noise levels. When your subject is lit mainly by flash, higher ISOs won’t do much to brighten the subject, since flash power is largely controlling that exposure. But higher ISOs will brighten the background ambient light.
This can be useful to balance dim backgrounds with a bright flash-lit subject. However, just as in any photography, higher ISOs introduce more noise into images. So it’s best to use the lowest ISO possible to achieve your desired flash-to-ambient balance while keeping noise levels down. Start at ISO 200 or 400, then adjust as needed from there.
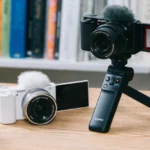
What Kind of Flash Works Best for Indoor Photography?
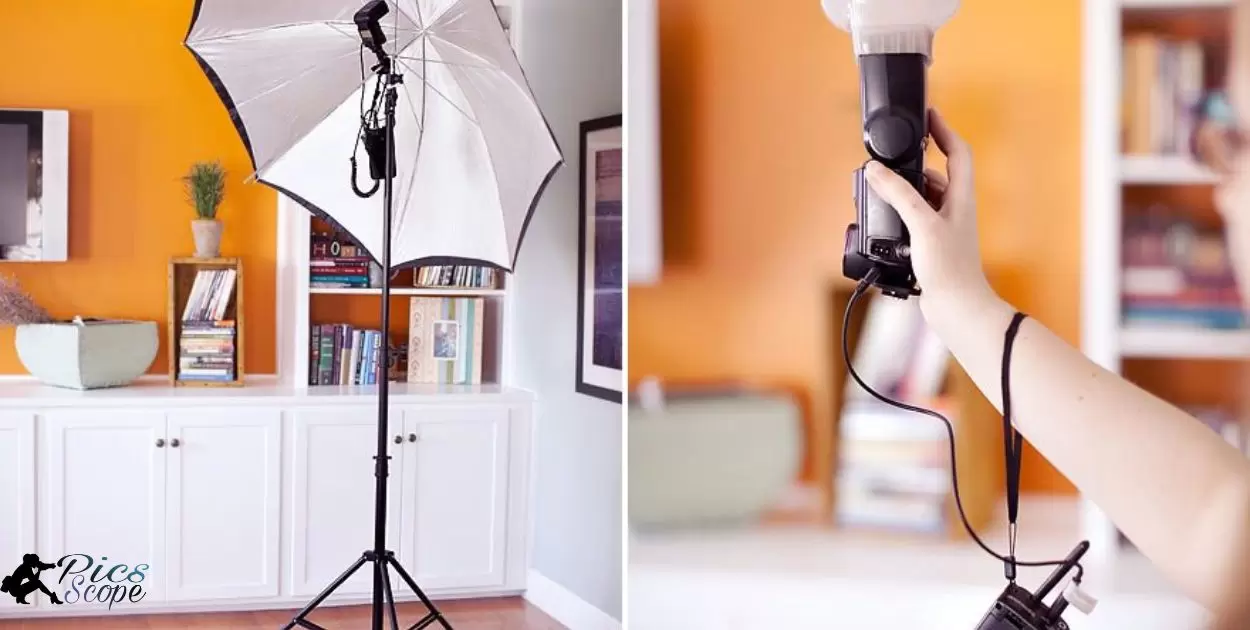
For indoor photography, an external flash unit like a speedlight or a studio flash generally works better than a pop-up flash. Speedlights are portable flashes that can be mounted on the camera hot shoe or used off-camera with wireless triggers. They provide more power and control compared to pop-up flashes.
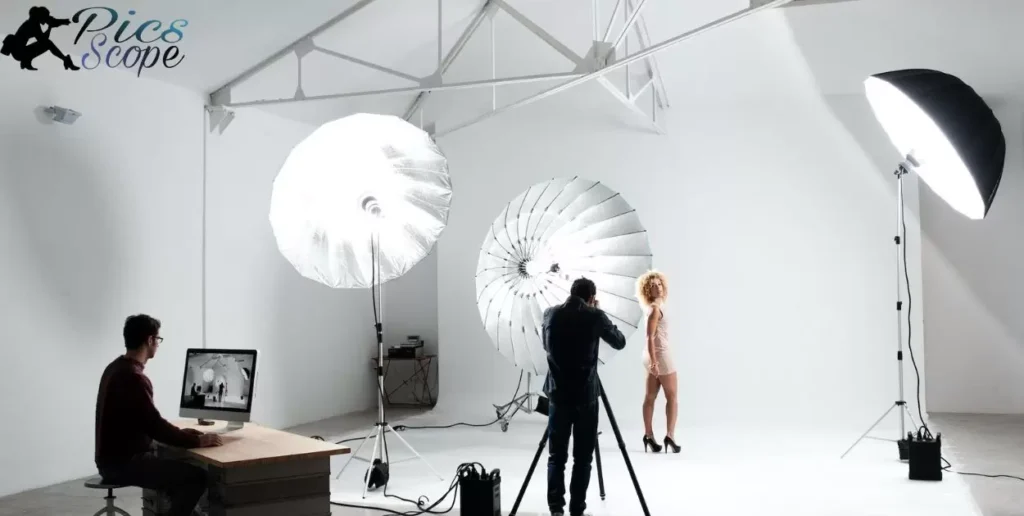
Studio flashes plug into the wall to provide consistent power and allow you to use light modifiers. They can overpower bright ambient light. While more expensive and less portable, studio flashes produce high quality light perfect for portraits or product shots.
The key is balancing flash power with ambient light. This is done by adjusting flash power, shutter speed, and aperture to expose the subject properly while retaining some ambient light. Using a bounce flash pointed at walls or ceilings creates a softer, more flattering light.
But directly pointing a bare flash at the subject can create harsh shadows. Light modifiers like diffusers or small softboxes also help soften the light. The best approach depends on the location and type of photos being taken.
Should I use a speedlight or studio flash for indoor photography?
Speedlights and studio flashes both have advantages for indoor photography. Speedlights are smaller, cheaper, and battery-powered so they are extremely portable. This makes them good for events, weddings, or location shooting where you must move around. They can also be used wirelessly off-camera.
Studio flashes plug into AC power so offer consistent output. They are more powerful, allowing you to overpower other light sources. This works great for product shots, portraits, or still life images. But studio lights lack portability, requiring access to outlets, and are bulkier to transport. Light modifiers like softboxes also require more room.
For most indoor event or candid shooting, speedlights offer the best balance of power, price and mobility. But for controlled studio-like shots, more powerful AC-powered studio strobes allow better light quality and control. Consider how much power you need versus portability when deciding on flash type.
Is a bounce flash good for indoor photography?
Yes, bouncing the flash is highly recommended for indoor photography. Bouncing the flash off walls or ceilings creates a larger, softer light source. This creates a more flattering, natural-looking light than pointing the bare flash directly at your subject. Direct flash can create harsh shadows and overexposed hot spots.
Bouncing diffuses the light, softening both shadows and highlights. Angling the bounce flash forward slightly also puts catchlights in the subject’s eyes for a more lively look. The tradeoff is losing some power compared to a direct flash. But for events, bounce flash often gives the best results indoors.
Just beware of colored surfaces that may cast an unwanted color cast on your subject when bouncing. White ceilings usually give the most neutral bounce surface. Bouncing off walls can create more directional lighting. Bounce flash gives you much more natural, professional looking light for indoor shots compared to a harsh direct flash.
Can I use a pop-up flash for indoor photography?
Does a corporate headshot cost” depends on various factors. Pop-up flashes may be a last resort indoors, but an external flash significantly improves results. Entry-level DSLR or mirrorless pop-up flashes have limited power, risking dark indoor photos. Harsh, unflattering lighting and fixed head positions make pop-up flashes less ideal for corporate headshots. Consider investing in external flashes for better control and professional results.
An external flash allows you to tilt and swivel the head for bouncing light. They also give you far more power for properly exposing subjects from a distance. Many allow you to diffuse or modify the light for a softer quality. While usable in a pinch, avoid pop-up flashes for indoor photography when possible. External speedlights or studio strobes will provide better light.
How Do I Take Better Photos Indoors Without Using Flash?
The key to taking good indoor photos without flash is to make use of available natural light. Look for light coming in through windows, skylights, and open doors. Position your subject facing or close to the light source to illuminate their face. Turn off overhead lighting which can cast unflattering shadows.
Use wider apertures, slower shutter speeds, and higher ISOs to help compensate for the lower light levels. You can also supplement natural light with reflectors or external lighting like LED panels. But try bouncing these off walls and ceilings rather than pointing them directly at your subject to create a more natural effect.
Can I take good indoor photos without flash?
Yes, you can take excellent indoor photos without using flash. The most important thing is finding and making the most of whatever natural light is available. Study the way light moves through a space at different times of day. A room that seems too dark in the morning could be flooded with beautiful soft light in the late afternoon.
Also, don’t be afraid to experiment with slower shutter speeds, wider apertures, and higher ISO settings to help capture enough light for a good exposure. Modern cameras perform very well at high ISOs. And a bit of grain is often preferable to harsh direct flash. With some practice at “seeing the light,” you can create gorgeous flash-free indoor images.
What are some tips for indoor natural light photography?
Some useful tips for indoor natural light photography include:
- Place your subject near a window for directional lighting
- Have them look towards the window to get nice catchlights in the eyes
- Use wider apertures like f/2 or f/2.8 to let in more light
- Lower your shutter speed as low as you can get away with and still avoid blur
- Turn off overhead lighting which can cast unflattering shadows
- Supplement natural light with reflectors or external lighting like LED panels
- Shoot in RAW format for more flexibility adjusting white balance/exposure
Practice makes perfect when it comes to finding flattering natural light indoors. Pay attention to the way light moves and bounces around the space. With some experimentation, you can create beautiful, artistic images without any flash.
How can I fix dark or grainy indoor photos without flash?
If your flash-free indoor shots turn out too dark or grainy, there are a few fixes you can try:
First, adjust the image brightness and shadows/highlights in post-processing. Most RAW files have enough dynamic range to recover some detail in underexposed areas.
- Also try reducing clarity, contrast, and saturation slightly to compensate for extra graininess at higher ISOs.
- If needed, convert the image to black and white which can help hide noise while accentuating textures.
- You can also blend a burst shot that’s slightly brighter or one that’s properly exposed for the shadows. This combines the best parts of both images.
- And going forward, bracket your shots, using wider apertures and slower shutter speeds to ensure you capture enough light. With practice, you’ll get a feel for the optimal exposure balance.
What Problems Can I Run Into With Indoor Flash Photography?
Some common issues with indoor flash photography include harsh shadows, overexposed backgrounds, red eyes in portraits, and color balance problems. Harsh shadows can occur if the flash is too strong or poorly diffused. Overexposed backgrounds happen when the flash overpowers ambient light. Red eyes are caused by light reflecting off the retina. And incorrect white balance settings lead to unnatural color casts.
How do I avoid bad shadows with indoor flash photography?
To prevent harsh shadows, try bouncing the flash off ceilings or walls to diffuse it. You can also use flash diffusers or softboxes. Position the flash off-camera for more flattering side lighting. And balance flash power with ambient light using manual settings or TTL flash metering. This prevents overly strong flash shadows.
What causes overexposed backgrounds with flash photography?
Overexposed backgrounds occur when the flash is too bright relative to ambient light. To fix this, turn down flash power and compensate with a slower shutter speed. The key is to balance flash and ambient exposures. You can also move the subject further from the background or flag the flash to prevent light spilling onto the background.
How can I prevent red eyes in flash photograph
Red eye happens when light reflects off the retina straight into the camera. To avoid it, have subjects look slightly away from the camera lens. Adding more ambient light also constricts pupils to minimize red eyes. Many cameras have red eye reduction modes that fire a pre-flash to constrict pupils before taking the photo.
FAQ’s
Should I Use Flash For Indoor Photography
Yes, using flash can help compensate for low indoor light and allow you to achieve proper exposure.
How Do I Avoid Harsh Shadows From On-Camera Flash?
Bounce the flash off ceilings or walls, use diffusers or softboxes, and balance flash power with ambient light.
What Settings Work Best For Balancing Flash With Ambient Light?
Use manual mode to adjust flash power, shutter speed, and aperture to balance the exposures. Slower shutter speeds allow more ambient light.
What Causes Overexposed Backgrounds When Using Flash?
Overexposed backgrounds happen when the flash overpowers ambient light. Turn down flash power or move subject away from background.
How Can I Prevent Red Eyes When Shooting Portraits With Flash?
Have subjects look away from lens, add ambient light, use red eye reduction mode, or position flash off camera.
Conclusion
Indoor flash photography can help improve image quality when ambient light is low. However, flash does come with some challenges like harsh shadows, overexposed backgrounds, and red eyes. With some adjustments like bouncing, diffusing, or repositioning the flash, many issues can be minimized.
Flash is a useful tool for gaining more control over tricky indoor lighting situations. But ambient light should also be utilized when possible through positioning subjects near windows and modifying blinds or curtains. In the end, whether or not to use flash depends on the specific situation. There is no definitive yes or no answer.
Photographers need to evaluate the available light and weigh the pros and cons of adding flash. The key is learning techniques to balance flash with ambient light. Then indoor flash can unlock many new creative possibilities without sacrificing image quality. With practice, most lighting challenges can be effectively overcome.