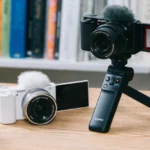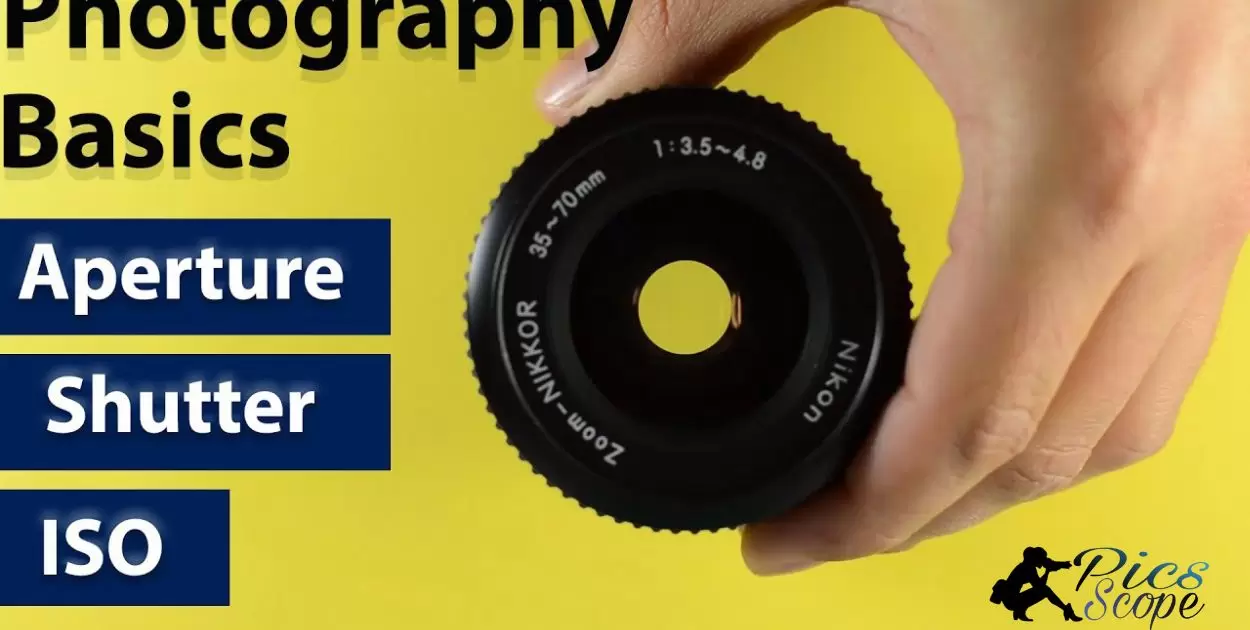
Photography Basics 101 Aperture Shutter Speed And Iso Nikon refers to the core settings on a camera that control how much light enters and creates the exposure. Aperture, shutter speed, and ISO make up the exposure triangle that allows photographers to capture their creative vision.
The key to great photos is learning to see the light. Photography Basics 101 Aperture Shutter Speed And Iso Nikon trains your eye to visualize brightness, movement, and focus. As you develop intuition around optimal exposures, your images will showcase crisp details bathed in beautiful light.
Getting off auto mode and into the driver’s seat of your camera’s settings takes some study and practice. Photography Basics 101 Aperture Shutter Speed And Iso Nikon rewards persistence with enhanced technical skills and artistic eye. Training yourself to balance aperture, shutter speed and ISO gives you the power to capture stunning photos full of mood, movement and visual impact.
What is aperture?
Aperture refers to the size of the opening in the lens that allows light into the camera. The aperture is measured in f-stops – common aperture settings on lenses include f/1.4, f/2.8, f/4, f/5.6, f/8, and f/16. The larger the f-number, the smaller the aperture opening. A wider maximum aperture (lower f-stop number) allows more light into the camera.
Controlling the aperture allows you to regulate the amount of light entering the camera. Wider apertures with larger openings (lower f-numbers) provide brighter exposures, while smaller openings (higher f-numbers) reduce the light entering the camera.
How does aperture affect exposure?
Aperture refers to the size of the opening in the lens that allows light into the camera. The aperture size is measured in f-stops – lower f-stop numbers indicate a wider aperture opening that allows more light in, while higher f-stop numbers indicate a smaller aperture opening that allows less light in.
A wider aperture (lower f-stop number) allows more light to hit the camera sensor, resulting in a brighter, more exposed image. A smaller aperture (higher f-stop number) allows less light in, resulting in a darker, less exposed image.
What is shutter speed?
Shutter speed refers to the length of time the camera shutter remains open to allow light to hit the image sensor. Slow shutter speeds allow the sensor to be exposed to light for longer, resulting in more light being captured and a brighter, more exposed image. Faster shutter speeds reduce the length of time light can hit the sensor, capturing less light and creating a darker, less exposed image. Become An Underwater Photographer
How does shutter speed affect exposure?
As the shutter speed gets slower, keeping ISO and aperture constant, more light hits the camera sensor since the shutter remains open longer. This additional light exposure results in brighter, more exposed images.
As shutter speed gets faster, less total light hits the sensor before the shutter closes, resulting in darker and underexposed images (unless ISO and aperture are adjusted to compensate). Fast shutter speeds can help freeze action, while slow shutter speeds intentionally blur motion.
What is ISO?
ISO refers to the light sensitivity of the camera sensor or film. It is set by the International Organization for Standardization (ISO), with lower numbers indicating less sensitivity and higher numbers indicating more sensitivity. For example, ISO 100 film needs twice as much light to get a good exposure compared to ISO 200 film.
In digital photography, higher ISO settings allow you to shoot in dimmer light but also introduce more noise or grain in the image. Lower ISOs produce cleaner images but may require slower shutter speeds or wider apertures to get a good exposure in low light. Most digital cameras have a “base” ISO around 100-200 which produces the cleanest images.
How does ISO affect exposure?
The ISO setting itself does not affect exposure, which is determined by shutter speed and aperture. However, changing the ISO allows you to indirectly adjust exposure.
For example, in low light you can raise the ISO to use faster shutter speeds or smaller apertures than would otherwise produce a good exposure.
This allows you to freeze motion or increase depth of field in dim conditions when you have less flexibility with shutter speed and aperture. The tradeoff is that higher ISOs introduce more noise and reduced dynamic range. So ISO affects the quality of the exposure but not the actual brightness. Lower ISOs generally produce cleaner exposures.
Using ISO creatively
Creative uses of ISO take advantage of the unique quality high ISOs produce. For example, the grainy “film look” of high ISOs can convey grittiness or rawness in black and white photos. This works well for street, documentary, or journalistic styles.
Raising the ISO in otherwise bright light allows for creative effects like shooting wide open on a sunny day for extremely shallow depth of field. Or capturing very fast action by using a fast shutter speed in daylight when lower ISOs would result in overexposure.
High ISO can also be used to intentionally overexposed images for bright, airy, ethereal looks. For example in portraiture or dream-like conceptual shots. Overall, manipulating ISO for creative impact relies on understanding the distinct stylistic effects of noise and reduced dynamic range.
Balancing the Exposure Triangle
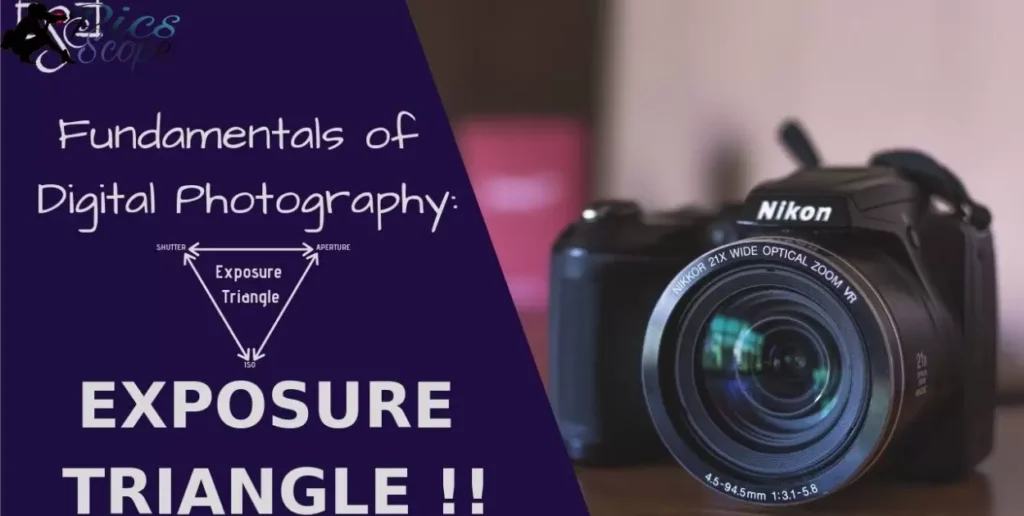
The exposure triangle refers to the relationship between aperture, shutter speed, and ISO. Mastering how these three settings interact is key to achieving correct exposure.
Aperture
Aperture controls the size of the opening in the lens to let in light. It is measured in f-stops. Common aperture settings are f/1.4, f/2.8, f/4, f/5.6, f/8, etc. A wider aperture (lower f-number) lets in more light, while a narrower aperture (higher f-number) lets in less light. Aperture also controls depth of field – images shot with a wider aperture will have a shallower depth of field.
Shutter Speed
Shutter speed controls the length of time the camera sensor is exposed to light. It is measured in seconds or fractions of seconds. A slower shutter speed like 1/30s lets in more light than a faster shutter speed like 1/250s. Shutter speed also controls motion blur – slower shutter speeds will show motion blur, while faster speeds can freeze action.
ISO
ISO controls the sensor’s sensitivity to light. A lower ISO like 100 requires more light to get a good exposure compared to a higher ISO like 1600. Higher ISO settings allow you to shoot in lower light conditions. However, higher ISO introduces more noise or grain in the image.
Achieving Correct Exposure
To achieve correct exposure:
- Start by setting your ISO. Use the lowest native ISO of your camera (usually 100 or 200) in good lighting conditions. Increase ISO if more sensitivity is needed, like when shooting in low light.
- Choose the aperture depending on desired depth of field. Wider apertures like f/2.8 will create background blur, while narrower apertures like f/11 give a larger depth of field with more of the image in focus.
- Adjust shutter speed to properly expose the image. Faster shutter speeds freeze action, while slower speeds create motion blur. Use a tripod or raise ISO if the shutter speed is too slow to handhold the camera steadily.
- Check the histogram on your camera to evaluate exposure. Adjust settings as needed to center the histogram without clipping highlights or shadows.
The key is to balance aperture, shutter speed and ISO to create the desired exposure for the shot. Adjusting one setting will often require compensating changes to the others to maintain proper exposure. With practice, balancing the exposure triangle to consistently achieve correct exposure will become second nature.
Balancing the Exposure Triangle
- The exposure triangle has three sides: aperture, shutter speed, and ISO. These control how much light enters the camera.
- Aperture is the size of the lens opening. Wider apertures let in more light. Aperture also controls depth of field. Wider apertures give a shallower depth of field.
- Shutter speed is how long the shutter stays open. Slower shutter speeds let in more light. Shutter speed controls motion blur. Slower speeds show more motion blur.
- ISO controls the sensor’s sensitivity to light. Higher ISO needs less light for exposure. But higher ISO causes more image noise.
Achieving Correct Exposure
Follow these steps:
- Set lowest native ISO, usually 100 or 200.
- Choose aperture for desired depth of field. Wide apertures give blurred backgrounds. Narrow apertures give more depth of field.
- Set shutter speed. Faster speeds freeze action. Slower speeds intentionally blur motion.
- Check histogram. Adjust settings to properly expose highlights and shadows.
Balancing aperture, shutter speed and ISO gives you creative control over depth of field, motion blur, and exposure.
Adjusting Settings for Creative Effects
| Creative Effect | Settings to Adjust |
| Shallow depth of field | Open up aperture to lower f-stop number |
| Pan motion blur | Slow down shutter speed |
| Freeze action | Speed up shutter speed |
| Low light/night shots | Increase ISO |
| Long exposures | Lower shutter speed and use tripod |
Camera Settings and Shooting Modes
Auto mode allows the camera to automatically select aperture, shutter speed, ISO, white balance, etc. This is good for beginners or quick shots, but offers limited creative control. Program mode lets the photographer adjust some settings like ISO and white balance, while the camera selects aperture and shutter speed.
This provides more flexibility than full Auto mode. Aperture Priority mode allows the photographer to manually choose the aperture to control depth of field. This is useful for portraits (wide aperture for blurred background) or landscapes (narrow aperture so everything is sharp).
The camera then automatically selects an appropriate shutter speed based on the selected aperture. Shutter Priority mode gives the photographer manual control over shutter speed to capture motion blur or freeze action. The camera then picks a suitable aperture for proper exposure based on the shutter speed.
Manual mode
Manual mode provides maximum creative control by letting the photographer independently set aperture, shutter speed, and ISO. Deliberate over or underexposure is possible for effect. Manual works best for stable lighting conditions. However, the photographer must monitor changes in lighting and adjust multiple settings quickly.
This can be difficult for fast action.Program and priority modes balance some automation with creative control. For example, aperture priority simplifies control over depth of field while the camera handles exposure. Manual works when precise control is needed but can be hard to manage. Priority modes automate some settings while still providing creative options. Auto mode offers the least control but is the easiest for beginners.
Auto Mode
- Camera chooses aperture, shutter speed, ISO, white balance, etc automatically
- Good for beginners or quick shots
- Limited creative control
Program Mode (P)
- Camera chooses aperture and shutter speed automatically
- Photographer can adjust other settings like ISO, white balance, etc
- More flexibility than Auto mode
Aperture Priority (A or Av)
- Photographer chooses aperture manually
- Camera selects suitable shutter speed automatically
- Allows control over depth of field
- Good for portraits (wide aperture for blurred background) or landscapes (narrow aperture for everything in focus)
Shutter Priority (S or Tv)
- Photographer sets shutter speed manually
- Camera selects suitable aperture automatically
- Allows control over motion blur
- Good for action/sports (fast shutter speed to freeze motion)
Manual Mode (M)
- Photographer sets aperture, shutter speed, and ISO independently
- Maximum creative control
- Can deliberately overexpose or underexpose for effect
- Best for stable lighting conditions
When to Use Each Mode
- Auto: When getting started or for quick shots
- Program: When learning more controls but still want assistance
- Aperture priority: When controlling depth of field is most important
- Shutter priority: When controlling motion is most important
- Manual: When you need precise control of all settings
Composition and Framing
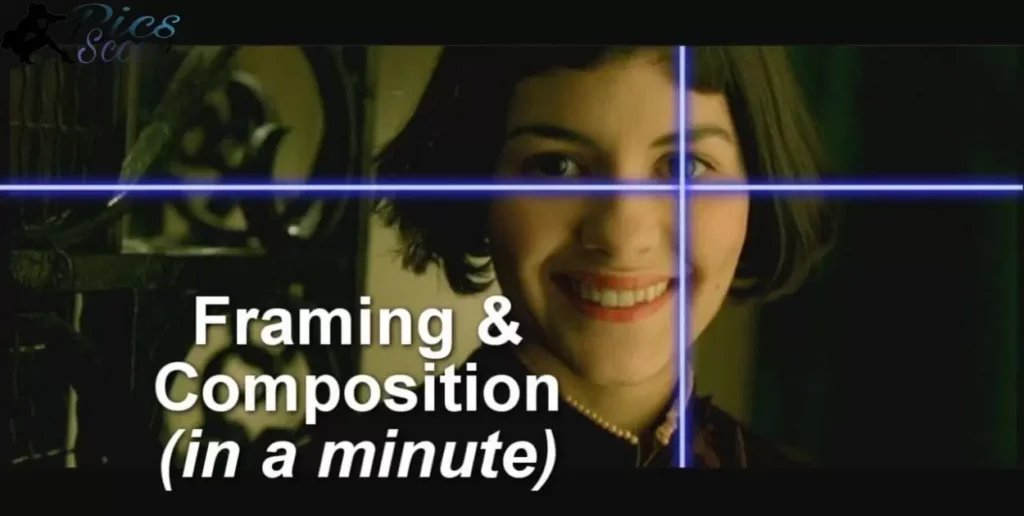
The rule of thirds is a powerful composition technique that involves dividing an image into thirds vertically and horizontally to create a grid. Placing important elements like the subject’s eyes along the grid lines or intersections creates an aesthetically pleasing, balanced photo. Leading lines utilize existing lines to draw the viewer’s gaze towards the main subject for enhanced focus.
Curving lines add depth while straight lines convey stability. Framing refers to using foreground elements to highlight the main subject by creating a frame around them. Natural frames like trees or man-made ones like windows work well.
Effective framing also utilizes contrast between the frame and subject, getting close to the foreground, and placing the subject off-center for added interest. The goal is to draw attention to the main subject with a pleasing composition.
Rule of thirds
The rule of thirds provides a foundation for balanced, engaging compositions. Breaking photos down into even thirds brings harmony similar to what is inherently pleasing in nature. Though a guideline, the human eye naturally moves to intersections in the grid, making the rule of thirds a reliable tool to emphasize subjects. With practice, photographers intuitively position subjects on the grid for optimal dynamism and flow.
Leading lines
Leading lines guide the viewer through an image along deliberate paths to land on the main subject. They create movement and depth while adding interest to scenes. Leading lines utilize any elements that direct the eye – roads, fences, shorelines, even stars.
Photographers see beyond the objects, visualizing how their lines and angles lead to subjects. Curves relax while diagonals add energy to engage viewers on unique journeys crafted through compositional tools like leading lines.
Balancing the Exposure Triangle
The exposure triangle refers to the relationship between aperture, shutter speed, and ISO. Mastering how these three settings interact is key to achieving correct exposure.
Aperture
Aperture controls the size of the opening in the lens to let in light. It is measured in f-stops. Common aperture settings are f/1.4, f/2.8, f/4, f/5.6, f/8, etc. A wider aperture (lower f-number) lets in more light, while a narrower aperture (higher f-number) lets in less light. Aperture also controls depth of field – images shot with a wider aperture will have a shallower depth of field.
Shutter Speed
Shutter speed controls the length of time the camera sensor is exposed to light. It is measured in seconds or fractions of seconds. A slower shutter speed like 1/30s lets in more light than a faster shutter speed like 1/250s. Shutter speed also controls motion blur – slower shutter speeds will show motion blur, while faster speeds can freeze action.
ISO
ISO controls the sensor’s sensitivity to light. A lower ISO like 100 requires more light to get a good exposure compared to a higher ISO like 1600. Higher ISO settings allow you to shoot in lower light conditions. However, higher ISO introduces more noise or grain in the image.
Achieving Correct Exposure
To achieve correct exposure:
- Start by setting your ISO. Use the lowest native ISO of your camera (usually 100 or 200) in good lighting conditions. Increase ISO if more sensitivity is needed, like when shooting in low light.
- Choose the aperture depending on desired depth of field. Wider apertures like f/2.8 will create background blur, while narrower apertures like f/11 give a larger depth of field with more of the image in focus.
- Adjust shutter speed to properly expose the image. Faster shutter speeds freeze action, while slower speeds create motion blur. Use a tripod or raise ISO if the shutter speed is too slow to handhold the camera steadily.
- Check the histogram on your camera to evaluate exposure. Adjust settings as needed to center the histogram without clipping highlights or shadows.
The key is to balance aperture, shutter speed and ISO to create the desired exposure for the shot. Adjusting one setting will often require compensating changes to the others to maintain proper exposure. With practice, balancing the exposure triangle to consistently achieve correct exposure will become second nature.
Post-Processing Nikon RAW Files
Post-processing RAW image files allows you to access the uncompressed data and make non-destructive edits to enhance your photos. Nikon RAW files with the .NEF extension contain more image data than JPEG files. This additional data enables more advanced editing flexibility.
When working with Nikon RAW files in post-processing, you first access the RAW data to render an editable preview of the image.
Software like Adobe Lightroom and Capture One provide user-friendly interfaces to adjust the rendering of RAW data while protecting the original file. These programs also facilitate making exposure, color, contrast and other enhancements to RAW images.
Accessing RAW Image Data
The first step is accessing the RAW data stored in the .NEF file via RAW processing software. Programs like Lightroom and Capture One render an editable preview of your RAW photo while keeping the original data intact. This allows non-destructive editing – you can revert back to the original RAW file at any time.
Settings like white balance, exposure compensation, contrast and color profiles are then applied to the RAW data to render the preview image you see on screen. The software lets you adjust these settings to achieve your preferred rendering of the RAW image prior to exporting a final edited JPEG or TIFF file.
Making Exposure Adjustments
With the RAW file preview open, you can make exposure adjustments to correct issues like over or underexposure. The extra data in RAW files allows you to rescue lost highlight or shadow details that would be unrecoverable in JPEGs. You can also adjust levels, contrast and whites/blacks to balance exposure across the image.
Enhancing overall contrast and vibrance is common in RAW processing. The software lets you tweak settings like clarity, vibrance and saturation while protecting the original file. You can also apply localized adjustments using tools like gradient filters and adjustment brushes. Output sharpening is also best applied to a final RAW-derived image before export.
Online tutorials
Online photography tutorials are a convenient way to build skills. Sites like YouTube, CreativeLive, and LinkedIn Learning have extensive libraries of photography tutorials. These cover everything from using your camera, composition techniques, editing software, and different genres like portrait, landscape, or sports photography.
The advantage of online tutorials is that they can be accessed anytime and allow you to learn at your own pace. You can search for specific topics and focus on the skills you want to develop. Online tutorials also tend to be more up-to-date compared to books. However, with the wealth of tutorials available, finding quality content can require some trial and error.
Nikon Learn & Explore
Nikon offers free online photography tutorials specifically for Nikon cameras called Nikon Learn & Explore. These video lessons are taught by professional Nikon photographers and cover core photography skills along with how to use Nikon cameras and settings. An advantage of Nikon’s tutorials is that they are tailored to the specific camera models and technology.
This helps you maximize the features of your Nikon gear. The downside is that the selection is more limited compared to sites offering photography tutorials on all brands. However, Nikon’s tutorials may be a good starting point, especially for beginners with Nikon cameras. They can lay the foundation before expanding your learning to other online resources.
Photography books
Books are a traditional but still effective way to advance your photography knowledge. Well-known books like Understanding Exposure by Bryan Peterson or The Digital Photography Book by Scott Kelby are photography classics with proven teaching approaches. Books allow learning at your own pace and provide in-depth coverage of concepts.
Book content can become outdated compared to online tutorials. Still, foundational photographic concepts remain relevant even if some technical details evolve. And classic photography books by experts like Ansel Adams or Henri Cartier-Bresson provide timeless inspiration through their images and stories. Combining books with online learning provides both comprehensive depth and modern relevance.
FAQ’s
What is aperture in photography?
Aperture refers to the size of the opening in the lens that controls the amount of light entering the camera.
How does shutter speed work?
Shutter speed determines how long the camera sensor is exposed to light during an exposure.
What does ISO measure in cameras?
ISO measures the sensitivity of the camera sensor to available light.
How do aperture, shutter speed and ISO work together?
Balancing aperture, shutter speed and ISO is key for achieving correct exposure and desired effects like depth of field or motion blur.
What shooting mode is fully manual?
Manual mode allows independent control over aperture, shutter speed and ISO for maximum creative flexibility.
Conclusion
Photography relies on proper exposure. Exposure is controlled by three camera settings: aperture, shutter speed, and ISO. These make up the exposure triangle. Aperture is the size of the lens opening. Wider apertures let in more light. Aperture also controls depth of field. Wider apertures produce blurrier backgrounds.
Shutter speed determines how long the camera sensor is exposed to light. Slow shutter speeds create motion blur. Fast speeds freeze action. Finally, ISO sets the sensor’s sensitivity to light. Higher ISO needs less light but causes more image noise.
Balancing aperture, shutter speed and ISO gives photographers creative control. Mastering the exposure triangle is critical for good photography. Resources like online tutorials and Nikon’s Learn & Explore help beginners understand these core concepts. With practice, they become second nature.