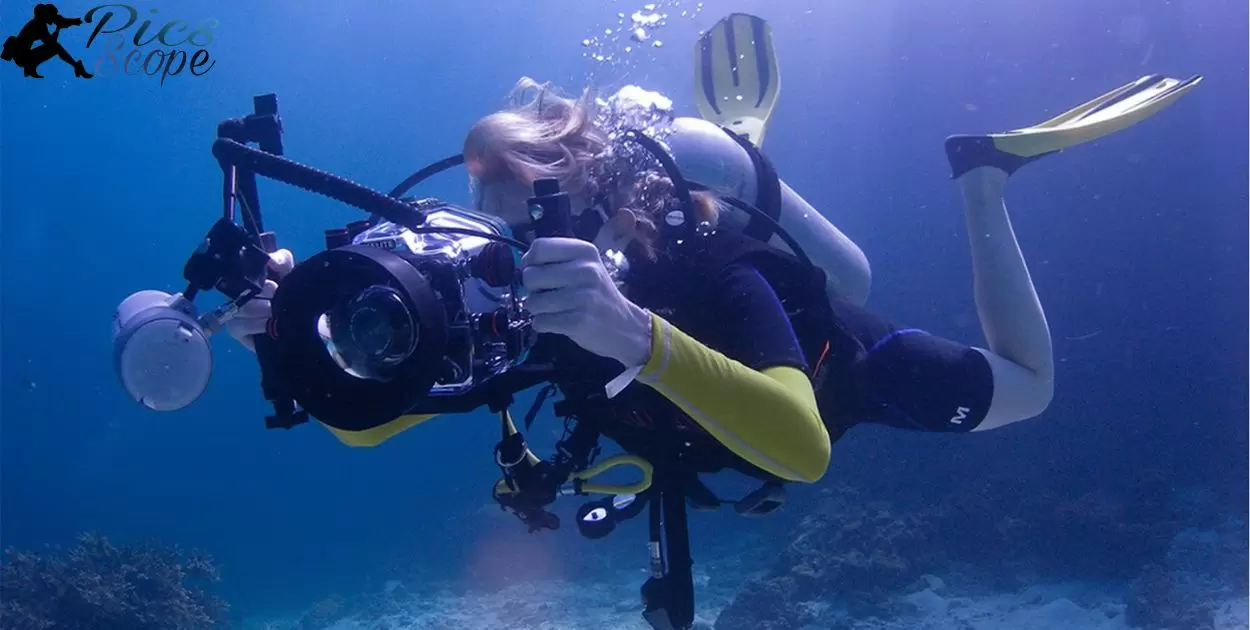
Underwater photography involves taking pictures below the surface of water bodies like oceans, lakes, and rivers. To become an underwater photographer, one needs to learn photography skills like using different camera settings and equipment. One also needs scuba diving training to be able to stay underwater and maneuver to take pictures.
How To Become An Underwater Photographer” sparks the imagination about exploring the fascinating marine world. It evokes visions of vibrant coral reefs, mysterious shipwrecks, and strange creatures that few get to witness. The allure lies in revealing this alien world to those on land through powerful visuals.
To become an underwater photographer, one requires patience and perseverance apart from mastering photography and scuba diving. It takes time to learn to capture high-quality images underwater while controlling buoyancy. But the rewarding feeling of showcasing rarely-seen marine life and seascapes provides strong motivation.
How to Get Started in Underwater Photography
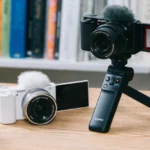
To get started in underwater photography, you need a waterproof camera and housing, lenses, lighting equipment, and accessories to mount and control the gear. Entry-level point-and-shoot waterproof cameras can cost a few hundred dollars. More advanced mirrorless or DSLR setups require a waterproof housing, which can run from $1,000 to over $5,000 depending on depth rating and features.
You can learn the fundamentals online through tutorials, courses, blogs, and guides. Many scuba diving certification programs also include an underwater photography component. Local camera stores, dive shops, or photography groups may offer hands-on classes. Expect to spend $50-500 for basic photography instruction.
What Gear Do You Need?
The basic gear for underwater photography includes a waterproof camera, lenses, underwater flash, and accessories to mount and control the equipment while submerged. Wide angle and macro lenses allow getting closer or fitting more in the frame. Strobes provide light in dark underwater environments. Arms, clamps, and trays securely hold everything.
Where Can You Learn Underwater Photography?
Online resources like YouTube tutorials, skillshare classes, forums, and websites offer affordable ways to learn underwater photography fundamentals. Local dive shops, camera stores, or photography groups may provide hands-on beginner classes. Scuba diving certifications often include an underwater photography component as well.
How Much Does Basic Underwater Photography Equipment Cost?
Entry-level waterproof point-and-shoot cameras can cost between $200-$500. More advanced mirrorless or DSLR housings run from $1,000 for basic models up to over $5,000 for high-end gear rated for deep depths. Basic lenses, strobes, trays, arms, and accessories will add another $1,000 or more. Expect to spend $2,500 to $5,000+ for a basic underwater photography setup by William Harper Photography.
Developing Your Underwater Photography Skills

Here are some key points on developing your underwater photography skills::
- Get comfortable in the water first through freediving, snorkeling, or scuba diving training before adding the complexity of photography. Good buoyancy and comfort underwater is critical.
- Start practicing in a pool with your camera to learn how it behaves and functions underwater before going on real dives.
- Ensure you understand how to use your camera manually, especially adjusting aperture, shutter speed, and ISO. Learn how light behaves differently underwater.
- Get as close as possible to your subjects, within 12 inches ideally, due to how water absorbs light and reduces color/contrast over distance.
- Use strobes/flashes to restore lost color and contrast. Position them off-camera for best lighting.
- Be respectful of marine life and the environment – get shots without touching, disturbing, or damaging anything.
- Use the right lenses for the shot – macro for small creatures, wide angle for big scenes.
- Post-process images to adjust color, contrast, backscatter, etc. – editing makes a big difference with underwater shots.
- Consider taking an underwater photography course or workshop to advance your skills with guidance from experts.
How Do You Improve Your Underwater Photography Technique?
There are a few key ways to improve your underwater photography technique. Take a class or workshop focused specifically on underwater photography. This allows you to learn from experts in a hands-on environment. Also, practice as much as possible when you are underwater.
Experiment with different camera settings, compositions, and lighting techniques to see what works best. Review your photos after each session and identify areas needing improvement.
Joining photography groups, either locally or online, also helps develop your skills. You can get feedback on your photos and new ideas from seeing others’ work.
Reading underwater photography blogs, magazines, and guides gives you tips and inspiration from professionals that you can apply on your next dive. Be sure to challenge yourself by trying new things and make changes to continue getting better.
What Are Some Common Mistakes Beginner Underwater Photographers Make?
Underwater photography comes with a unique set of challenges. Many beginners struggle with keeping the camera still which leads to blurry photos. It takes practice learning to move slowly and brace yourself or the camera against something sturdy. Beginners also often forget to get close enough to their subjects.
Because water filters out red light, photos can turn out dull and blue if you are too far away. Getting as close as possible brings out vibrant colors. Insufficient lighting is another common pitfall. Sunlight fades quickly underwater so using flash or strobes is essential. If avoiding backscatter, it’s important to learn how to properly angle and diffuse the light.
Beginners also frequently make editing mistakes like oversaturating photos. This can cause unnatural, overly vivid colors. Instead, opt for subtle enhancements. Proper white balance adjustment is also key for accurate, bright images.
How Long Does It Take To Become Proficient At Underwater Photography?
Becoming truly proficient at underwater photography takes time and practice but going on regular dives with your camera accelerates the learning process. Being comfortable controlling your buoyancy and gear is necessary before you can successfully compose photos underwater. This step alone can take about 10-20 dives.
Once you have the basics down, after about 30-50 dives, you will have a good grasp on operating your camera settings to capture properly exposed, sharp images with pleasing compositions. Mastering more advanced techniques like lighting and editing your photos requires an additional 50+ dives.
It typically takes 6 months to a year of actively practicing underwater photography before all the pieces come together and you can produce impressive images consistently during your dives. Be patient, keep studying other’s work, and persistently work on your weaknesses. Proficiency develops gradually through experience and over 100+ hours behind the lens.
How Do You Compose Good Underwater Photos?
Good composition is key to taking compelling underwater photos. Consider the rule of thirds to position important elements off-center for a balanced, appealing frame. Pay attention to leading lines that draw the viewer into an image. Frame shots to minimize backscatter and clutter in the background. Get close to subjects and focus on capturing interesting behaviors or small details.
Experiment with different angles and perspectives when composing underwater scenes. Shoot subjects straight on, from above, below, behind, or from the side for more dynamic images. Adjust your position to avoid cutting off parts of marine creatures. Compose wide environmental portraits to place sea life in context or capture expansive seascape vistas.
What Camera Settings Should You Use For Underwater Photography?
Use shutter priority mode to control blur and freezing action, starting with a fast shutter speed like 1/125th sec. Choose a low ISO like 100 to minimize noise. Set the aperture to f/8 for sharp focus or go wider for more light and background blur. Enable macro mode when shooting small sea life up close. Opt for burst mode to machine gun shots of fast-moving creatures.
Balance ambient light and flash for properly exposed shots. Dial in negative exposure compensation to avoid overexposed images. Customize white balance for accurate colors underwater. Use manual focus for guaranteed sharpness on subjects or set a small AF area to control focus points. Bracket exposures to ensure getting optimal settings.
How Does Lighting Affect Underwater Photos?
Lighting has a big impact on underwater images. Photos can turn out dark or have a color cast without proper lighting. Use strobes, video lights, or constant sunlight to properly expose and color balance shots. Position artificial lights close to the camera to minimize backscatter.
Pay attention to the direction of sunlight streaming down for best effect. Use a snoot or diffuser to soften harsh light. Capture creatures silhouetted against a bright background. Backlit subjects for a rim lighting effect. Take advantage of beams of light slicing through the water to create visual interest. Use a reflector when shooting in shade or dark areas.
Processing and Editing Underwater Images
Post-processing is an essential step for underwater photography to correct issues like color casts, low contrast, and backscatter. The table below outlines common adjustments made when editing underwater photos and the effect they have.
| Adjustment | Effect |
| White Balance | Removes blue/green color cast |
| Exposure | Brightens/darkens image for optimal subject brightness |
| Contrast | Increases separation between dark and bright areas |
| Color Saturation | Intensifies vibrance and color intensity |
| Dehaze | Reduces veiling effect caused by water particles |
| Noise Reduction | Minimizes graininess, especially in darker regions |
| Sharpening | Counters softness from focus/movement issues |
| Backscatter Removal | Eliminates distracting particles suspended in water |
| Cropping | Improves composition by removing unwanted elements |
The goal is to achieve bright, balanced, sharp images without an artificial appearance. Try to avoid overediting underwater photos. Subtle adjustments tend to look more natural while still enhancing the image.
What Software Is Used For Underwater Photo Editing?
There are several software options for editing underwater photos. Adobe Lightroom and Adobe Photoshop are the most commonly used programs. They provide powerful tools for adjusting color, exposure, sharpness, and more. Other options like Capture One, DxO PhotoLab, and ON1 Photo RAW also work well.
Underwater photographers often use specialized plugins like AquaTech’s Underwater Color Correction to compensate for color shifts. When selecting software, make sure it allows working with RAW files for greater flexibility. You’ll also want good selective editing tools to adjust specific parts of an image.
How Do You Correct Common Underwater Photo Issues?
There are a few typical issues that can affect underwater images. A bluish color cast is common due to the water filtering out warmer red/yellow light. This can be corrected by adjusting the white balance or using underwater presets. Overexposure from bright surfaces can often be fixed by selectively lowering the exposure of the affected areas.
Backscatter from floating particles can be minimized via cloning, healing, or frequency separation tools. Noise in darker regions can be reduced through noise reduction settings without losing sharpness. Barrel or pincushion distortion from water magnification may need lens profile corrections.
Take the time to understand what causes these common underwater photo problems. Then learn techniques using your software tools to improve color, brightness, reduce noise and distractions. The more images you edit, the better you will get at efficiently fixing them. Watch tutorials to pick up new correction methods tailored to underwater issues.
What Adjustments Can You Make To Improve Underwater Photos?
There are many adjustments you can make to underwater images to enhance them. Adjusting white balance is essential to correct the cool, blue color cast. Contrast and clarity adjustments help compensate for light absorption and improve definition. Dehaze tools lower the veiling effect of water particles in wide shots.
Selective brightening brings out darker subjects and regains lost contrast. Denoising clears up noise while retaining detail. Sharpening helps counter softness from focus issues or movement. Vignetting draws attention towards subjects and away from edges. Cropping eliminates clutter and improves composition.
Don’t go overboard when editing underwater photos. Subtle adjustments tend to look more natural. Try to achieve bright, well-balanced and sharp images without an artificial quality. Save copies of the originals before making edits in case you need to go back. Learn the dynamic range of underwater shots and adjust them accordingly. Make sure you view the images on multiple devices to see how they truly look.
Finding Places To Practice Underwater Photography
Good locations for beginner underwater photographers include calm, clear sites with easy access like Bonaire, Grand Cayman, Cabo San Lucas, Monterey Bay, or local pools and lakes. These allow you to practice skills and equipment in controlled conditions before attempting more challenging environments.
Focus on mastering buoyancy, lighting, and camera settings first. Good subjects to photograph include coral reefs with vibrant soft corals, sponges and reef fish; shipwrecks for wide angle ambient light shots; muck dive sites to find camouflaged creatures; cenotes for unique cave light play; and black water sites to capture bioluminescent organisms at night.
The search results provide extensive information on top locations around the world for underwater photography, along with tips on photographic subjects, ideal conditions, and recommendations based on skill level. Local pools, lakes, and easy shore diving sites are best for beginners to practice skills and equipment before attempting dedicated dive trips.
What Are Some Good Locations For Beginner Underwater Photographers?
- Bonaire – Easy shore diving, calm conditions, clear water, good for beginners
- Grand Cayman – Good visibility, warm water, variety of marine life to photograph
- Cabo San Lucas, Mexico – Clear water, sea lions, whales, sharks to photograph
- Monterey Bay, California – Kelp forests, sea lions, octopuses, cormorant birds
- Local pools or lakes – Practice shooting underwater in a controlled environment first
Where Can You Find Good Underwater Photo Subjects?
- Coral reefs – Vibrant soft corals, sponges, colorful reef fish
- Shipwrecks – Dramatic wide angle shots with ambient light
- Muck diving sites – Strange and camouflaged creatures like frogfish and octopus
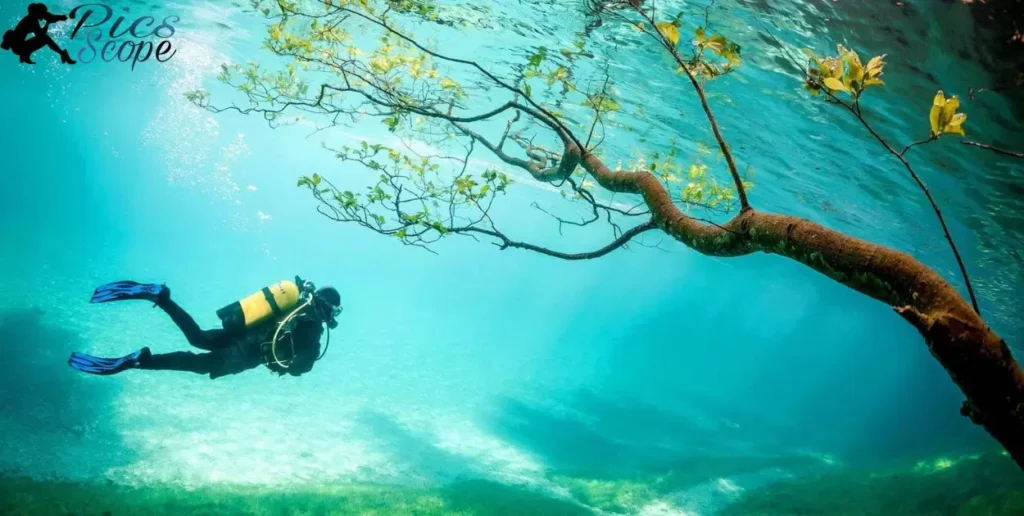
- Cenotes – Unique light play and clear visibility for cave photography
- Black water sites – Bioluminescent creatures that rise up at night
What Conditions Are Best For Underwater Photography?
- Good visibility – At least 15-30 meters visibility
- Calm sea conditions – Avoid large waves or surge
- Shallow depths – More light and colors, especially for beginners
- Appropriate weather/water temperature – Comfortable for the location
- Time shoots for good lighting – Early morning or late afternoon light
FAQ’s
How much does it cost to get started in underwater photography?
Getting started in underwater photography doesn’t have to be expensive. You can buy an entry-level camera and housing for under $500. Add a strobe and accessories over time.
What skills do you need to be a good underwater photographer?
Excellent buoyancy and dive skills are essential. You need to be able to hold position and compose shots without damaging marine life or stirring up silt. Patience and the ability to anticipate behavior helps capture unique images.
Is special training required to shoot photos underwater?
Taking a beginner underwater photography course can shortcut the learning curve. You’ll learn key techniques and camera settings. Experience through practice dives is also invaluable.
What kind of equipment is best for a beginner underwater photographer?
Start simple with a compact camera and housing. They are affordable, easy to travel with and simpler to master. Add accessories like strobes and wide angle lenses over time as your skills progress.
How can an aspiring underwater photographer improve their skills?
Practice, practice, practice! Shoot often in a pool or easy local dive site. Study photography composition techniques. Join a photography dive trip to learn from experts in ideal conditions. Review your images critically for continuous improvement.
Conclusion
Becoming an underwater photographer requires dedication and perseverance. The first steps are to become a skilled scuba diver through extensive training and over 300 logged dives. You must also gain a deep knowledge of marine biology to understand animal behaviors underwater.
Mastering photography fundamentals like composition, lighting techniques, and editing is critical before adding the complexity of shooting underwater. Once competent in both diving abilities and photography skills, aspiring underwater photographers should invest in proper waterproof camera gear and strobes and continually practice to refine their unique style.
While the path is challenging, the payoff is the privilege of exploring the ocean’s mysteries through a camera lens. Underwater photographers play a vital role as storytellers of the sea, capturing visually stunning images that can educate people worldwide about marine life and inspire ocean conservation efforts.